Part of the step by Step Guide, where you will learn how to transform you 3D Model to an interactive VR experience easily, using Simlab Composer.
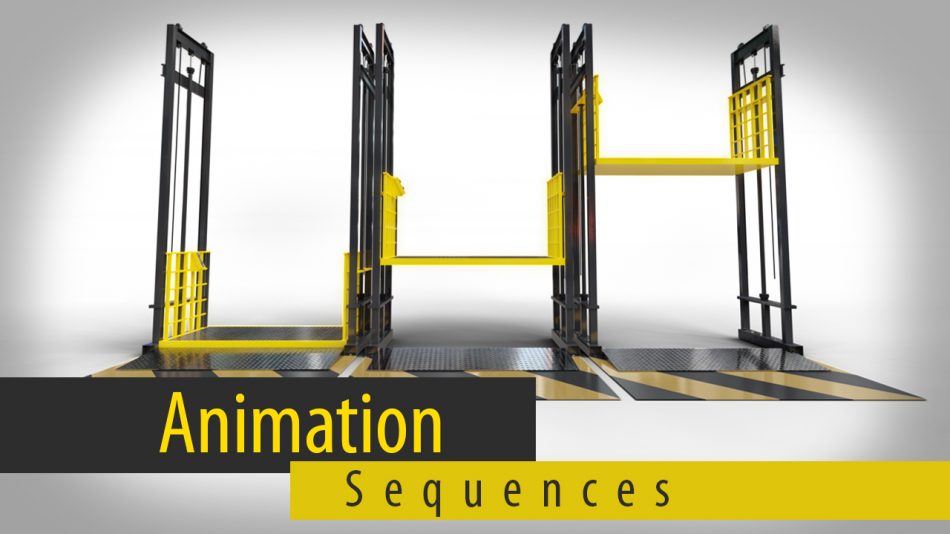
This is the Second part of the Series, in which, we are going to explore Animation.
To View the First part of this series Click here.
You can download the Models used in the tutorials here ( Model 1 , Model 2 )
How Important is Animation in creating a VR Experience?
Animation in general, is very essential in VR in many ways, and on different levels. Let’s say we are exploring an architectural design in VR, wouldn’t the experience be more immersive if the viewer was able to open doors? This simple interactive component greatly raises the user’s engagement in the scene, making it a memorable, more enjoyable experience.
Aside from non-essential interactivity like opening doors, some VR Scenes require animated objects as basis to the experience. Mechanical designs, Product design, and Training in VR can not be of any real value without animation.
How to create Animation in SimLab Composer?
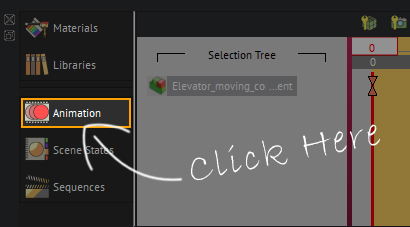
Creating animation in SimLab Composer is very easy, the first step is to reveal the time line by clicking on the Animation Tab, at the bottom left corner.
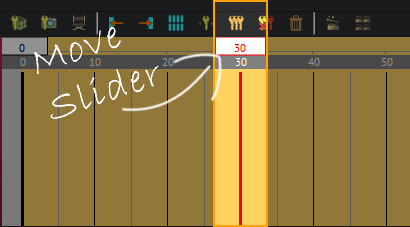
The second step is to move the current time slider to any frame.
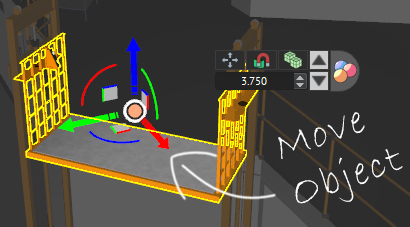
The last step would be to transform the object. Transformation may include, moving, rotating or scaling the object.
A keyframe will be created at the current frame, and at frame 0.
The Following Video explains the Process of implementing an animation in VR, so watch it to get an in-depth look at the process.
How to make the animation usable in VR?
Now that you have created an animation, what you need to do next, is to preserve it as a unique entity to be able to use it. Saved animations or animation sequences, as it is called in SimLab Composer, are elements that you can connect to objects using the actions system, or the training builder.
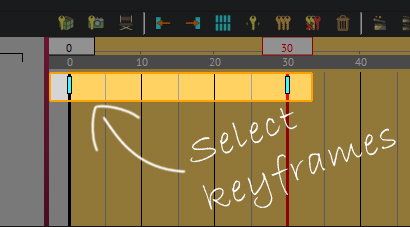
To Create an animation sequence, First, select both keyframes.
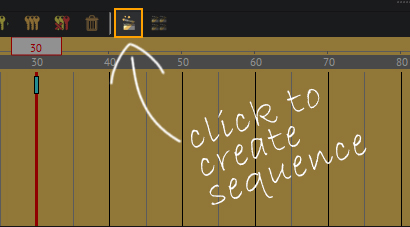
Then, click on the create animation sequence button.
Type-in a name for the sequence, and press “ok”.
Attaching the sequence to an object to make it usable in VR.
There are two ways to attach sequences to objects in VR, the first would be through the Training Builder. The Training builder is an advanced node based system, that allows you to create complex events system. We will talk further about the training builder later in the series, but for now, lets see how we can attach sequences using second method, which is the Actions system.
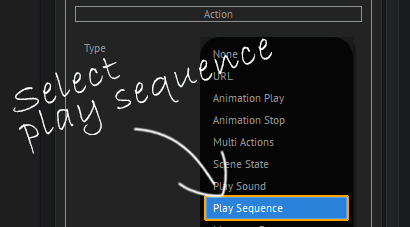
Select the object you want to use as a trigger in VR. Then, from the object’s panel to the right, set the action type to “Play Sequence”.
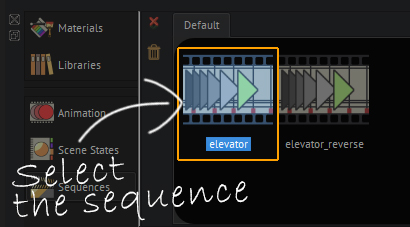
The bottom panel will automatically switch to the sequences tab, now select the sequence you have created.
Congratulations! you have successfully implemented your first interactive animation in VR, run the VR experience to enjoy your triumph!
If you have any questions, feel free to write them down in the comments section.
In the Next part of the series, we are going to explore how to add options and alternatives for objects and object’s appearances using Scene States.
Go to Part 3 of the series : Scene States.
-

1 How to Create Interactive VR Assembly & Disassembly Experiences with SimLab Composer
-
2 One Experience, Seamlessly Running on VR, MR, AR, and XR
-
3 Fast, Affordable Custom VR Experiences – Pay Only if You’re Satisfied!
-

4 Looking for VR Creators for Our SimLab VR Store
-
5 Seamlessly integrate VR Quizzes and Surveys into your LMS
-
6 Transforming Vocational Training with Virtual Reality
-

7 Lua Scripting in SimLab Training Builder: From Beginner to Beyond
-
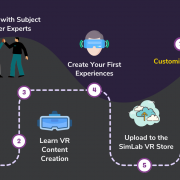
8 How to Start a VR Creation Service Business: A Step-by-Step Guide
-

9 9 FAQs on Usage and Creation of VR Experiences
-

10 From CAD to VR in less than 5 minutes

Pingback: How to create an interactive VR experience yourself. • 3D CAD VR
Pingback: Changing object's appearance in VR using Scene states. • 3D CAD VR
Pingback: Controlling Animation in VR with Grabbable Sequences • 3D CAD VR