SimLab Composer is a Hub for transferring and transforming your 3D design, it can load a huge variety of 3D file types, and is able to output them in different formats and to different platforms. It can create rendered images for models, View them in VR, and also export them as 3D PDF, WebGL among other file formats that you can check here.
A problem might arise when the 3D model that you’re working with is too heavy to export as a 3D PDF document for example, or the VR device that you planning to View your scene with is a low end device, and it can’t support a large number of polygons or textures.
A solution for those obstacles and many others is the optimization tools offered by SimLab Composer.
Texture Optimization
A crucial element in optimizing 3D Scenes is making sure that the number of textures and their size isn’t huge. The texture optimzation tool in SimLab Composer is able to compress and resize all textures in the scene.
To Access the tool, go to the File menu and select “Texture Optimization”. Additionally you can access it from the “Show in Viewer” Dialogue, under the SimLab VR Viewer menu.
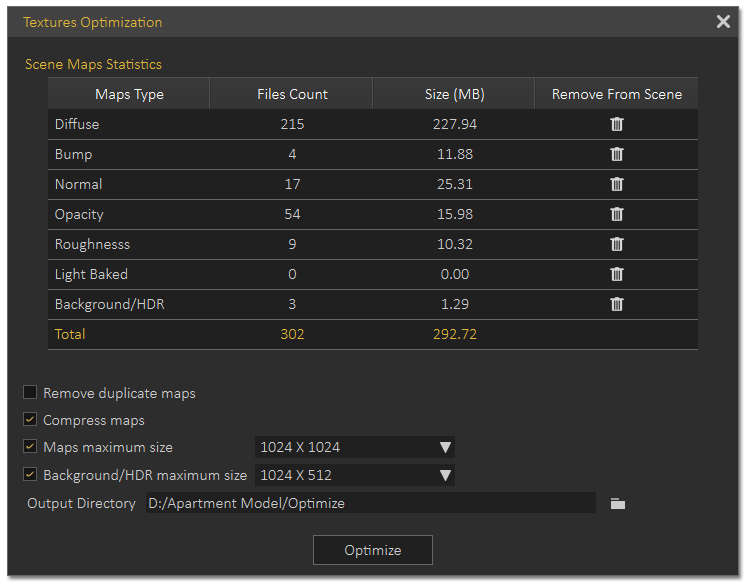
A screenshot of the Texture Optimization Dialogue in SimLab Composer
In the Scene Maps Table you will see the number of textures and their size for each type of textures. Clicking delete Icon in one of the rows, all the textures of that type will be removed from the scene.
Texture Optimization options :
- Remove Duplicate Maps : Removes any duplicate textures and have the materials use a single shared texture.
- Compress Maps : Uses a compression algorithm to reduce the size of the texture while maintaining its resolution.
- Maps Maximum Size : Sets a maximum resolution for textures, any textures excceeding that resolution will be resized to the maximum size.
- Background/HDR Maximum Size : Similar to the Map Maximum Size tool, but applies to Background and HDR images with different height to width ratio.
- Output Directory : Determines where the processed files are going to be placed. This option is important to preserve the original textures, in case you want to use them in their original state.
Optimizing texture size Tutorial
Mesh Decimation
The mesh decimation tool reduces the polycount of a 3D object without affecting its appearance greatly, given that you use it in a reasonable fashion.
To access the tool, go to the Geometry menu and select “Mesh Decimation”.
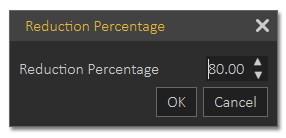
A screenshot of the Mesh Decimation dialogue in SimLab Composer
To use the Mesh Decimation tool:
- Select one or more object.
- Run mesh Decimation tool.
- Set the Reduction percentage.
- Click Ok to start, then click the check mark to finalize the process.
Mesh Decimation Tutorial
Optimize VR package
Optimize package merges all objects sharing the same material into one object, which in turn speeds up the experience and smooths it significantly, specially when your model has a large number of objects.
Keep in mind that optimize package will affect static objects only, so if you have objects that has animation, scene states or are part of any interaction they will be excluded from the process and any interactions in VR will occur without any problems.
To access thise Option go to the “SimLab VR Viewer” Menu, then select “Show in Viewer”, then click Settings.
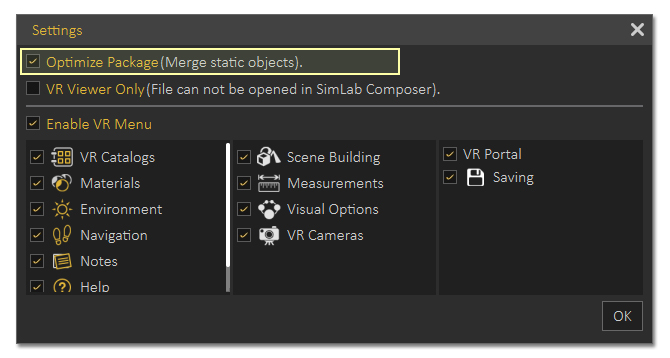
Optimize VR Package Option in the VR Settings Dialogue
Optimize VR package Tutorial
Cast Shadow
An Additional Tip that you can follow to Optimize VR is to disable Cast shadows for some of the lights.
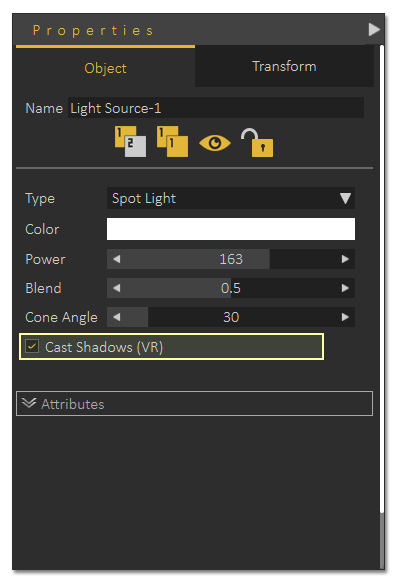
With the light selected, in the objects tab to the right, click on “Cast Shadow” to disable it.
Keep in mind that the cast shadow option is available for all types of light, and only applies to VR experiences and not rendering.
-

1 How to Create Interactive VR Assembly & Disassembly Experiences with SimLab Composer
-

2 One Experience, Seamlessly Running on VR, MR, AR, and XR
-

3 Is My VR Experience Secure on the Cloud?
-

4 Bought VR Headsets for Your School… and Now They’re Collecting Dust?
-

5 How to Choose the Best VR Solutions for Universities: A Comprehensive Guide
-
6 Fast, Affordable Custom VR Experiences – Pay Only if You’re Satisfied!
-

7 Looking for VR Creators for Our SimLab VR Store
-

8 Why SimLab Soft is Creating VR Training for Medicine and Nursing Students
-

9 Seamlessly integrate VR Quizzes and Surveys into your LMS
-

10 Master 3D/CAD/VR File Conversion with SimLab CADVRter: Essential Tool for Designers and Engineers, and Related Professionals

